Tips for Traveling with Photo Equipment
For more than ten years now, I have been working as a professional photographer and cinematographer. For the last few years, I specialize in travel photography and the time-lapse technique. This involves traveling to remote destinations, often by plane, and carrying expensive, heavy and bulky photo equipment. As a consequence, I have had some problems at airports, customs and with different means of transportation. However, those incidents have given me a great experience in the art of adapting yourself to the situation and finding ingenious and economical solutions. I hope some of the following tricks will be useful to you.
Your camera, lenses and laptop always with you.
This could sound quite obvious, but there are still some people that check in a part of their equipment because is too heavy or bulky.
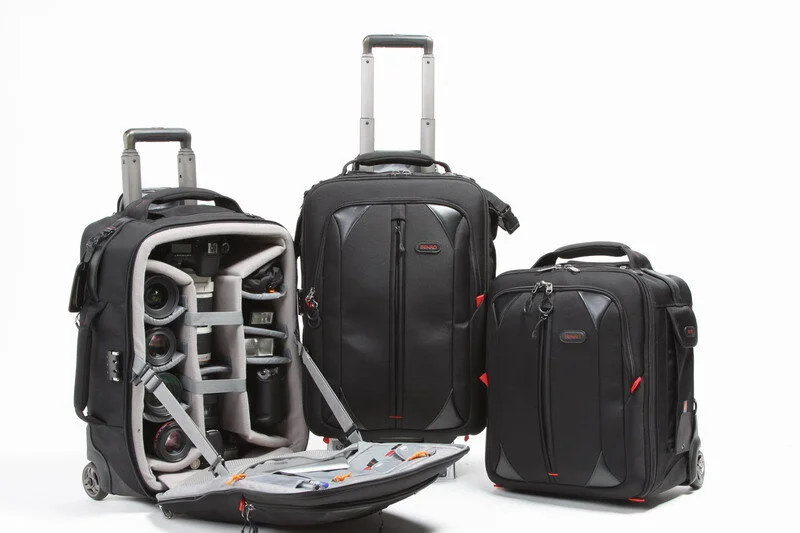
My trick is: I carry all the equipment (camera and lenses) in a large Benro trolley, where everything fits quite well. I also carry a small shoulder bag with the laptop, an external hard disk and a snack. While I’m doing the check in, I show the shoulder bag as my only hand luggage and try to hide the Benro trolley. After the check in, I put the shoulder bag inside the Benro in case the airline only allows one piece of hand luggage. Usually the Benro weighs much more than allowed, but when you reach the boarding gate they no longer control the weight of the hand luggage. It worked for me 100% of the time.
Tripods and slider in a golf club bag.
If you are going to a place where it’s cold and your bag is already close to 20 kg, but you also want to take two or three tripods plus a slider, as I do, it will be impossible to fit everything in a single bag. The most economical option is to buy an additional suitcase as “sports equipment”. Usually all the airlines offer this option, which allows you to carry a bag up to 23 kg for about 60 or 70€. That will be cheaper than the 10€ per kg that you have to pay for excess weight.
I use a travel bag for golf clubs, where my motorized slider, mSlider, and my Benro tripods fit perfectly, and if I have some space left, I can fit some clothes in that will also protect the equipment.
Bring extra battery chargers and power strip.
Depending on where you are traveling and your battery consumption, having some extra battery chargers is almost essential. In cold places the batteries could perform on a less than 50% capacity. It doesn’t matter how many batteries you take, if you just have one charger, you might end up stranded. I usually take two chargers for each camera, or double chargers. In this way, you can charge two at the same time, and you can also be sure that if one breaks down (something that happens often), you will have another one. Depending on the model of your camera, it can be very difficult to find a spare charger, especially if you are in a remote location.
Another useful accessory is a multiple connector with 4 or 5 plugs. Who hasn’t been in an hotel room with a single plug? Without our friend, the multiple connector, you will have to charge your three batteries and your laptop in turns , and that may complicate the load even more.
Plan your trip carefully.
Buy extra luggage in advance and try to use a reliable airline with a good customer service policy. The low-cost airlines are fine for shorts trips with hand luggage, but when you are traveling with equipment, is far better to use a trustworthy airline. Compare the conditions of each airline, their baggage weight allowance, number of bags, etc. You could have an unpleasant surprise if you haven’t planned everything right, and the trip can get more expensive than you imagined.
An insurance is almost essential.
While it is true that airlines should be responsible for your bags, in most cases the financial compensation that will cover for loss is very low. In addition to that, the difficulty of their claim, make almost essential to hire a travel insurance. The best option is to buy your tickets using Visa or AMEX. These cards include insurance that usually works well in case of baggage loss and other incidents. However, if you want to secure your equipment in the best possible way, I recommend using a specific insurance, they could be more expensive, but if you’re going to a complicated place or one with adverse weather conditions, it might be worthwhile.
Be polite to the airport staff.
They have to spend many hours there, and sometimes they don’t like the job they have to do, so whether it’s the person behind the check in counter or behind the scanner, a smile and a friendly greeting can make a difference between they looking away or imposing the regulations. The rules are there and they are equal for all, but they are applied differently depending on who does it and the attitude you have that day. If you start whining and pouting, the airport staff will find a way to make it more difficult for you.
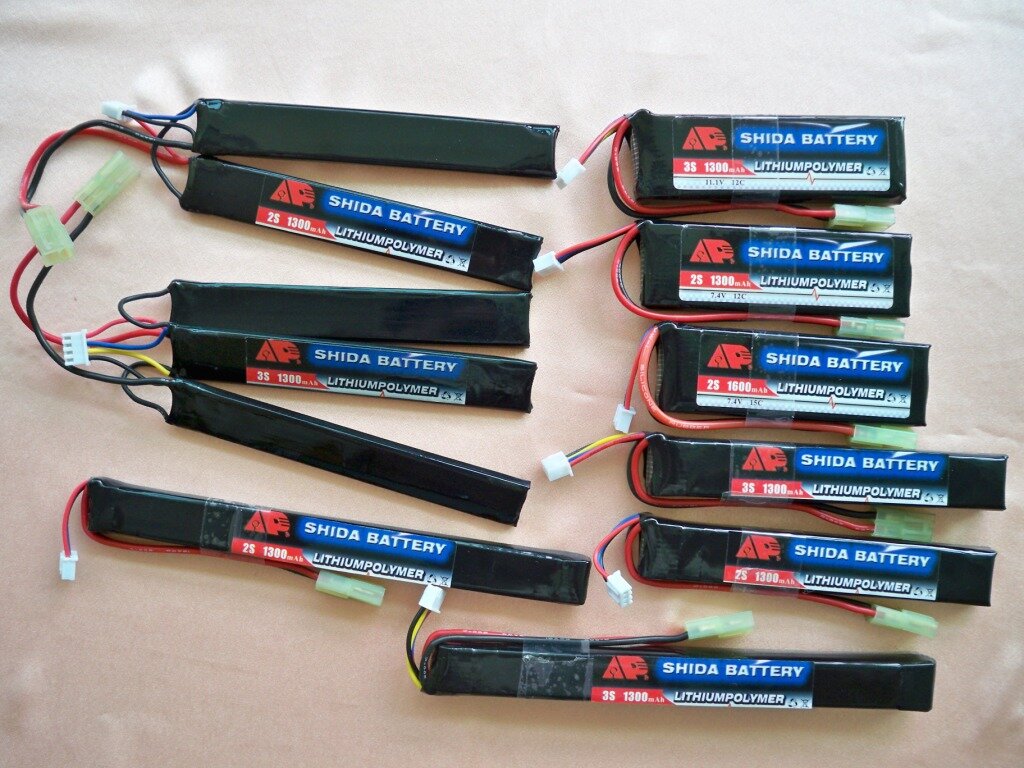
Be careful with Li Po.
More and more electronic devices use Li Po batteries. I use them a lot for my motorized slider, the mSlider, because they provide a lot of autonomy with an optimal weight and size. But these batteries are often controversial at airports, because they run the risk of catching on fire. Get informed on the number of batteries allowed and their total amps. Never check them in, because all the bags are passed through the scanner, and if the staff considers that it’s unsafe for the flight, they will block your bag and it may not reach its destination. So, better
put them in your hand luggage, so you can show them to the staff and explain them it’s for audiovisual purposes and within the allowable limits. I have 3 5A batteries and never had any problems, however the staff always asks me about them.
Always go early to the airport.
As you have already seen in the tips above, is not the same to check in your luggage for a beach trip than to overcome the adventure of check in and go through the scanner with all your photo equipment. Therefore, it is essential to get to the airport with plenty of time, otherwise if you have any problems in the check in counter or at the security control, you might end up missing the flight or running through the halls like crazy to reach the gate.
I remember once in Iceland I left a tripod on the airport bus, and I realized it when I was at the gate. Because it was early, I could go back to the bus, pick it up and go through the security control again, returning to the gate on time.
Save the photos on two separate external hard disks.
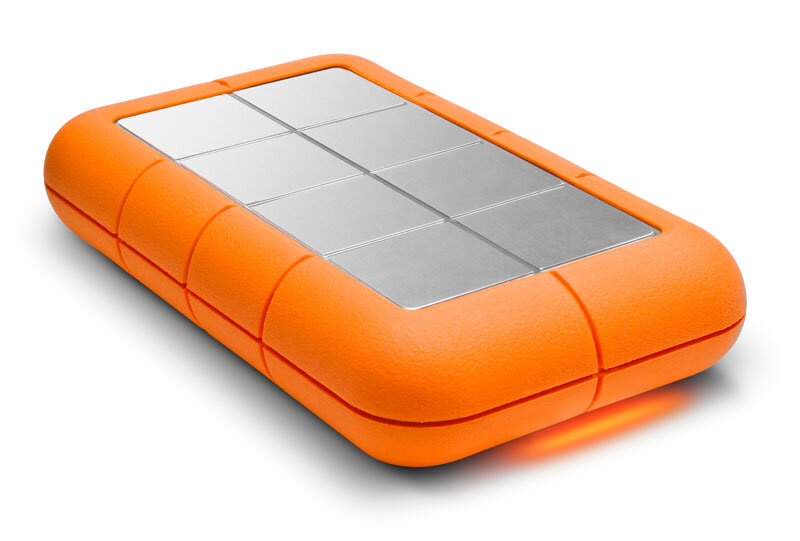
While Raid hard drives are very useful and depending on the format, they even increase the speed; I always recommend saving all the material in two separate external hard drives, which I keep in two different bags.
I have absolute panic about losing material after the trip, so I always make two or three backups. There is nothing more terrible as returning from a 10 day trip, where you have invested a lot of money and time, and find out that you lost or broke the external hard disk. I use 2.5″ external hard drives of 2TB, and I carry one copy in the camera bag and other in the shoulder bag, where I also have the laptop and snacks. And, this is also important, never eat the food they offer you in the plane. Or, do you want to spend an entire week sick?
Depending on the number and value of the equipment, and your travel destination, you may need to fill the ATA. This document is essentially a list of the material you are going to bring to a new country. You will have to include a specific list with each piece, its value and serial number. At the customs, they can ask you for this document to check if what you carry and these list match. It can also happen that when you are returning, they ask you for it to verify that you haven’t sold or left some of the equipment in the travel destination.
If your photo equipment is small, you won’t need the ATA, but I recommend you at least to travel with the receipts for the cameras and lenses, in case they ask you for them at the customs. A scanned copy on your laptop should be enough.


